1.IMPORTING STANDARD ESHOP OBJECTS
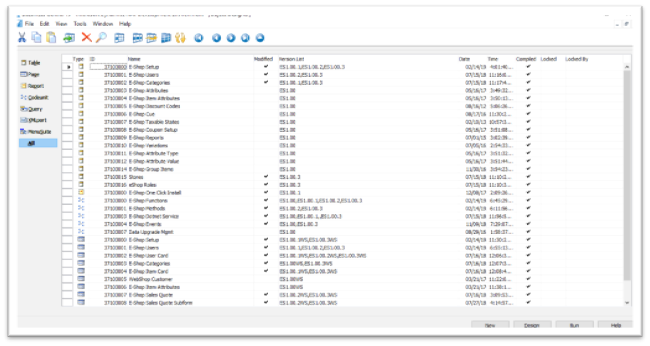
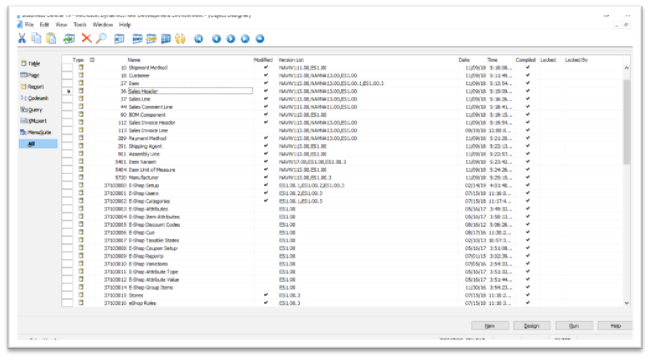
Start the installation by merging eShop standard objects into Business Central. eShop’s standard objects are assigned a series starting from 37103000 range. The objects, tables and fields start from the same range too. This number series can help distinguish between the standard BC objects vs eShop’s standard objects.
Please find the below displayed screenshot of eShop related objects:
2.BUSINESS CENTRAL STANDARD OBJECTS
eShop has its own standard objects that is separate from the standard objects that already exist in the BC. These objects get imported into BC directly upon installation. The goal of this process is to update the D365 BC standard objects to match the eShop’s standard object coding. Every eShop object modified has its own documentation that highlights the code changes in the comments section of the code page. Based on the documentation, update the related Standard BC object tables. Ex. Changing in the code, adding fields etc.
eShop has added an extended version list to identify the changes made to its standard objects with an extended version list – ES1.00. Go to the BC Development tool/Object Designer mode. All the standard objects are displayed here. Highlight the ‘Version list’ for filter to search for eShop modified objects with the search tag – @*ES1.00*. Go to each of the modified tables, page and code units individually, look for the documentation and make the necessary updates to the Standard BC objects manually.
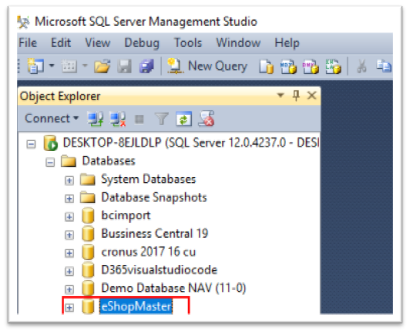
Below is the screenshot of the eShop objects: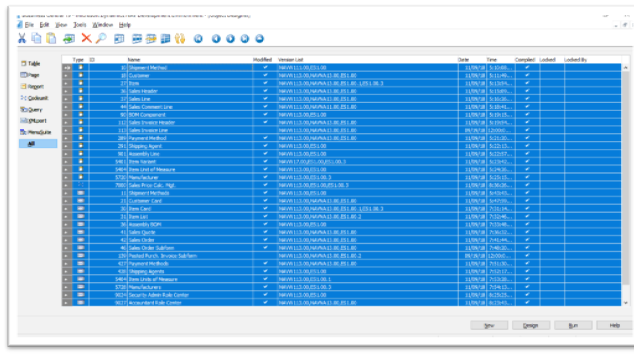
Eshop object identification that we made in the version by ES1.00 can be seen by filtering the objects to @*ES1.00*
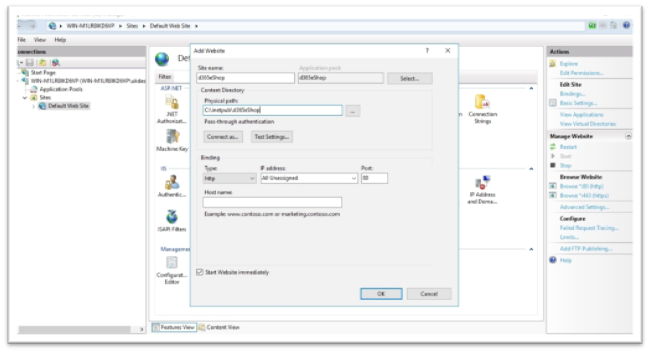
3.CREATING THE ESHOP DATABASE
eShop DB holds tables related to eShop category, products, manufacturers etc. Whenever any data gets published into the BC Database, the same will reflect in the eShop DB as well. The website is looking at the eShop DB.
Steps to create new Database:
- Open SQL Server. Right click on Database and create new DB.
- Run the SQL script provided to create/alter new database.
- Create a user for the newly created database and give DB owner rights.
4.SETTING UP THE WEBSITE
Once the eShop database has been successfully setup, we can move on to creating a website in the IIS. Following are the steps to create the site:
- RDP to the web server, Install IIS, if it isn’t already on the machine.
- Copy d365eShop zip folder provided by Dynamics eShop and extract into c://Inetpub/d365eShop
- Launch IIS – Start -> Administrative tools -> Information Internet Services manager.
- On the left navigation bar, right click on the sites and create new site.
- Enter name, select default pool – asp.net v4.0 and in the physical path, provide the path to the web supported NOP folder – c://Inetpub/d365eShop and the port number.
- Click Ok and a new website is ready. (NOTE – Files are recommended to be saved under c://Inetpub as a standard eShop procedure)
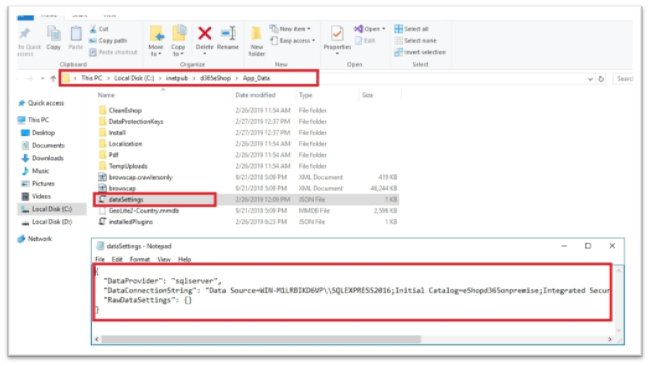
- Provide eShop database access info in the Data Settings file.
- Access to d365eShop folder – > App_data – > dataSettings
- DataConnectionString: Data Source =client server name;
- Initial Catalog = eShop database name;
- User ID – Sql User ID.
- Password – Sql Password.
- Save and Close the file.
5.UPDATE ESHOP SETUP CARD & ONE CLICK INSTALL
UPDATE ESHOP SETUP CARD
Access Business Central –> Search –> E-Shop Setup card
Enter the eShop URL, tab over and the eShop Admin URL and the eShop Web Services URL will be auto populated.
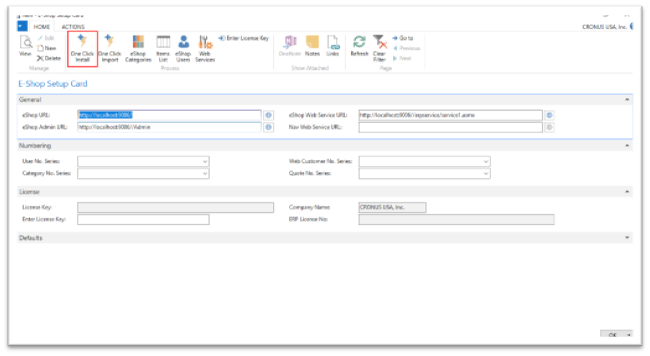
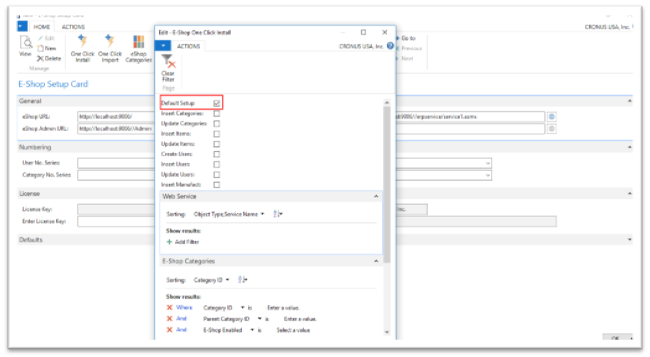
ONE CLICK INSTALL
- Locate and click the One Click Install on the E-Shop setup card page ribbon.
- Select the Default Setup checkbox. (This will configure the default settings, auto generate the necessary fields on the Numbering tab in the setup card and setup the Web Services)
- Click Ok to exit the page.
NOTE: Save the BC Web Services URL link. You’ll need this to set it up on the website. The eShop Admin URL will take you to the website backend. You’ll need to access this upon completing the setup to connect the website to your D365.
You are now all set configuring eShop for D365 in the eShop setup card. Your new website is ready with the Standard theme implemented.
6.WEBSITE ADMINISTRATION SETUP
Your next step is to connect the website to your Dynamics 365 Business Central. Below are the steps to accomplish that.
- On the E-Shop setup card in Business Central, click on the eShop Admin URL link to take you directly to the backend of your website.
- From the eAdmin – select ERP Webshop Services on the left-hand panel

- Enter information on the above fields, Test Connection and you should see the ‘Connection Successful’ message once the connection has been made.
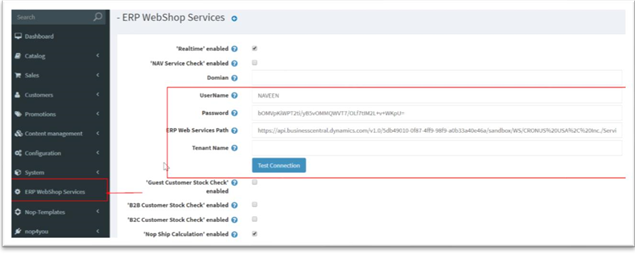
UserName:- Your Dynamics 365 Business Central Login User Name.
Password:- Web Service Access Key is your password. (can be found in the Users Card)
ERP Web Service Path:- Refer to the NAV Web Service URL from the eShop Setup Card to obtain the path for this field.
With this, your website is ready with Real-time Integration to Dynamics 365 Business Central.
7.USER GUIDE TO SETTING UP WEB DATA
Once the site is Live, prepare the site with data for testing Integration. This means publishing the data from Business Central to the site. There are 2 ways of accomplishing this. One manually by publishing each product individually and the other would be to mass publish using our – One Click Install functionality. Below is a procedure to setup the data individually. Start with publishing a category and then the Item.
7.1.CREATE AND PUBLISH CATEGORY FROM BUSINESS CENTRAL
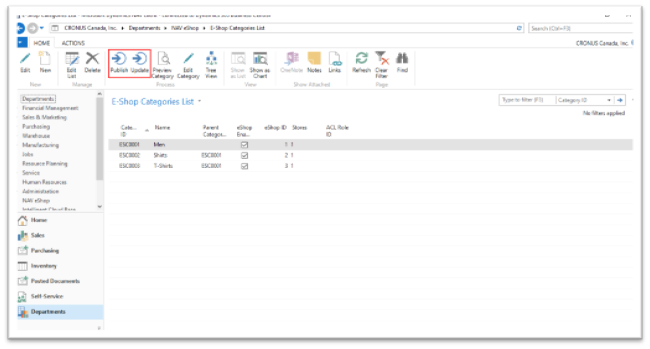
- From the RTC –> Go to Departments -> NAV eShop -> E-Shop Categories list – > select New from the ribbon.
- Provide a unique category ID, Name, and the Parent ID under which you want to create a sub category. Note – If you are creating a parent category, leave the parent category id field blank.
- eShop enabled must be checked for the category to be published onto the website.
- Go to Actions on the main menu and click on Publish. You’ll receive a confirmation on the category published.
- Note - eShop ID field is auto populated with a unique number once the category is published.

To Test – Go to the website, the category you just published will show on the home page. You can also look for it under products section from the main menu.
7.2.CREATE AND PUBLISH AN ITEM
- From the BC RTC – go to Departments – > NAV eShop -> Items card. Select an existing item or Add New Item.
- If you are creating a new item – Fill in the mandatory fields on the standard Items list page with Name, Description, UOM, Unit price.
- Access the fast tab - eShop on the Items list page – select the category from the dropdown, manufacture code (Optional…select if manufacture info is setup) and check the eShop enabled box – (Note: By checking the eShop enabled box and publishing the item, the item info gets pushed to the site).
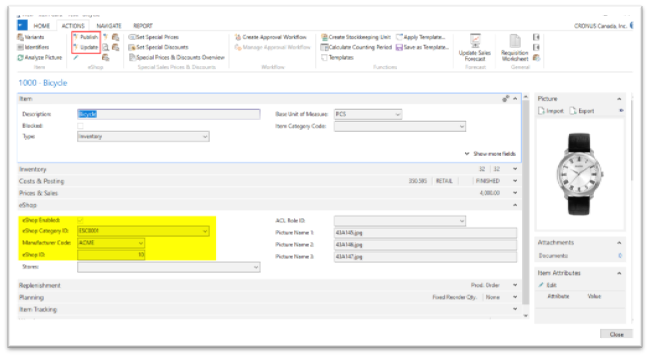
- From the main menu, go to Action tab – Publish.
- eShop ID is auto populated once the Item is published and you receive a confirmation pop up stating the Product is published.
To Test – Go to the website, search for the new Item published in the search field or in the products tab from the main menu you’ll find the Item listed under the respective category selected.
7.3.CREATE AN ESHOP USER FROM BC - B2B USER & B2C USER
B2B User – created in the Business Central:
- From the BC RTC, go to Departments -> NAV eShop -> E-Shop Users page.
- Click New to create a new eShop User.
- Enter the mandatory fields to create a user
| User ID | Auto populates a unique series of numbers/letters |
| Email Address | This will be your eShop login ID as well |
| First Name | Enter your First Name |
| Last Name | Your Last Name |
| Password | enter your password |
| User Type | Select Customer in this column |
| No. | Enter the Customer number to which you will be associating the eShop User |
| EShop Enabled | Check this box to push the eShop User information and to enable the user on the website. |
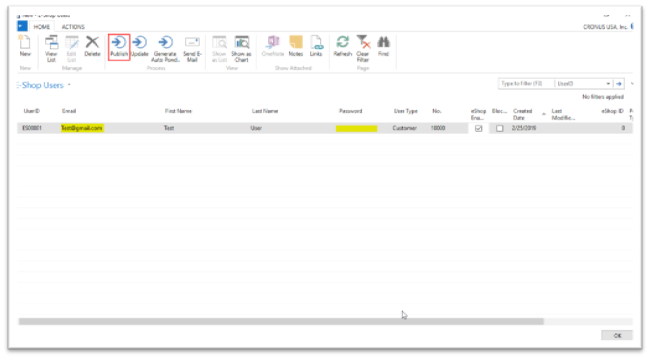
- Go to Actions tab -> click on Publish. Once published the eShop Id field number will be auto populated.
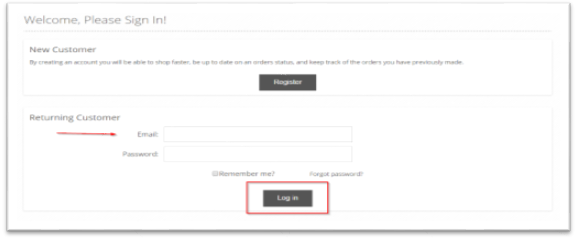
To Test – go to the website and Click on the Login on the top left corner of your screen -> Enter your email address and password in the Returning Customer area. If a eShop user was created successfully, you’ll be logged into the site.
B2C User – created on the website:
Typically, customers are encouraged to Register (create an account) on the website and checkout so their account info exists in the system and they’ll have the ability to view all their transactions, open orders, close orders in the future. To create an account:
- Go to the website – > on the top left corner, click on the Register. Enter all the mandatory fields on the page and click Register. This will create a web customer entry in Business Central.

To test – Logout after creating an account and go back to the website -> click on Login ->enter your credentials. If an account was created successfully, you’ll be logged in.
7.4.CREATE AN ORDER
- Log into the website with the User Credentials you just created.
- Browse the website, select an item and Add to cart.
- Go to the Shopping cart and Checkout.
- Select the Shipping Address or click Add New for a new address.
- Select the Billing Address from the existing list or Add New address.
- Select Shipping method and click next (use default shipping method to test)
- Select Payment method and click next (use PO order to test)
- Click confirm to confirm the order
This creates a real-time sales order in Business Central.
To Test - Copy the Order Number and go to Business Central -> Departments -> NAV-eShop – Sales Order page. Search with the Order Number to verify that all the items purchased show up in the sales line of the sales order.
8.INSERTING OR UPDATING DATA IN BULK
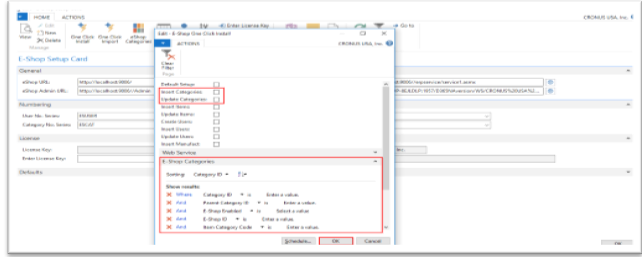
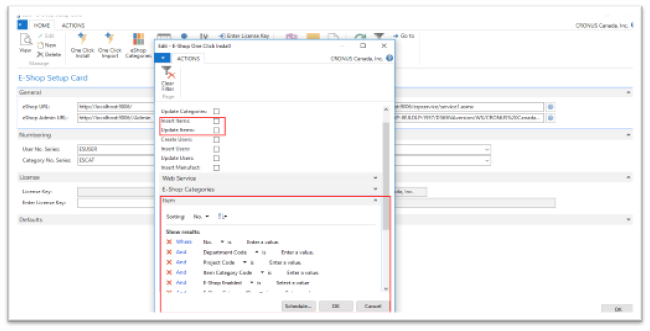
- To insert Categories or Items in Bulk, go to – Departments -> NAV eShop – > E-Shop Setup Card. Select One Click Install from the ribbon.
- Enable the option, Insert Categories to mass publish categories to the website. Go to the E-Shop Categories tab to add the required filters and click OK to Insert.
- Similarly, to mass Update Categories, select Update Categories, provide filters and Ok to Update.
- Follow the same process to Mass Publish or Update Items or eShop Users to the website.