1.eShop Installation Guide
The purpose of this tutorial is to guide you through the installation and setup of eShop for Microsoft Dynamics 365 Finance and Operations. This tutorial assumes that you have already installed the eShop Microsoft Dynamics Life cycle Services package onto your Microsoft Dynamics 365 Finance and Operations and that you have already requested and received both your eShop and Admin URLs from Dynamics eShop.
2.eShop Setup
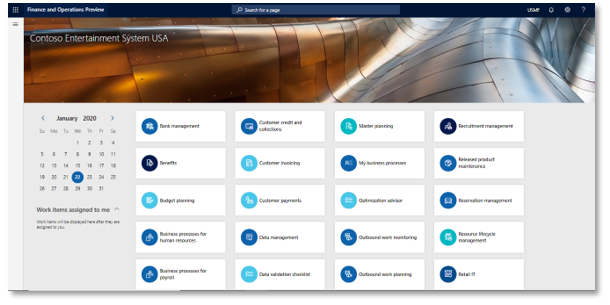
Go to your Microsoft Dynamics 365 Finance and Operations Dashboard.
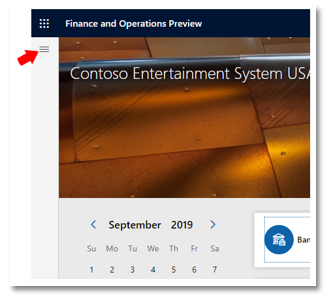
To setup your eShop > click on the hamburger menu at the top left of the Dashboard, just under the header.
When you click on the hamburger menu, a navigation pane will appear > click Modules to extend the menu > click eShop. This will extend the eShop navigation menu to Inquiries and Setup > click Setup and eShop parameters.
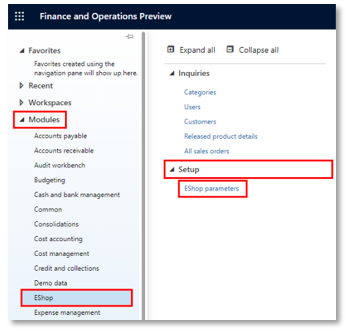
In the eShop parameters, you will need to visit two (2) menus: General and Number sequences > click General.
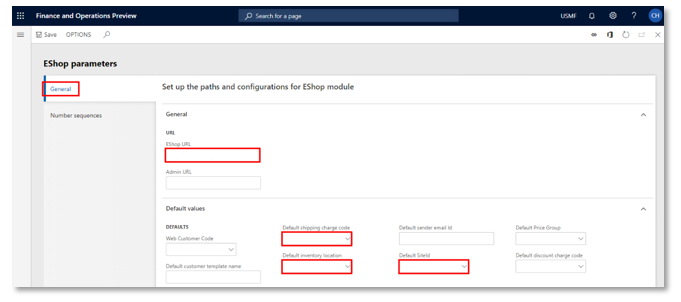
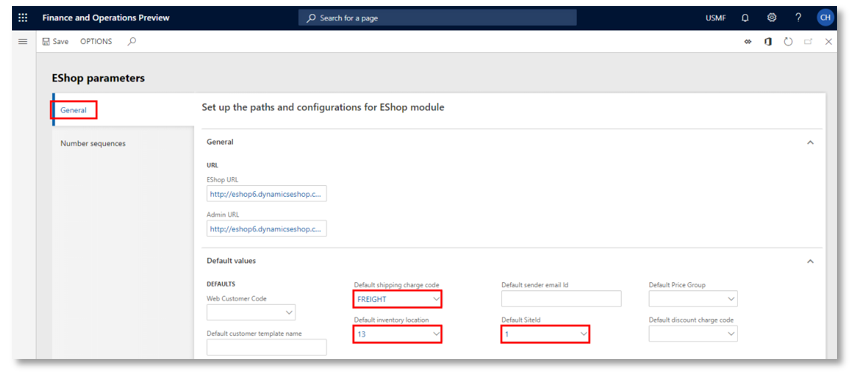
Fill the mandatory fields in the General screen > enter your assigned EShop URL > tab over to Admin URL (just below the EShop URL field) and it will automatically populate an URL.
In the Default values section > tab over to enter information into the fields: Default shipping charge code, Default SiteID, and Default inventory location. You can use the field entries from the screenshot below.
New Number sequences for product categories are an important requirement for your eShop Setup. Your eShop team has already completed this setup for you. You can now move on to the next step, eShop Admin setup.
3.eShop Admin Setup
Your IT department should have already connected your Microsoft Dynamics 365 Finance and Operations. But before moving forward, you will want to be sure. Below are the steps to accomplish that:
You can access your new eShop website by copying and pasting your new EShop URL into the browser of your choice. When you are on the homepage, go ahead and log in with the credentials we sent to you in our previous email. You will need to go to the backend Dashboard of your eShop website (or Administration Dashboard). You can do this in one of two ways:
• Click on the Administration Link on the top of the Home Page.
• On the eShop Parameters setup form in the General tab from step 2, click on the eShop Admin URL link. It will take you directly to the backend of your eShop website.
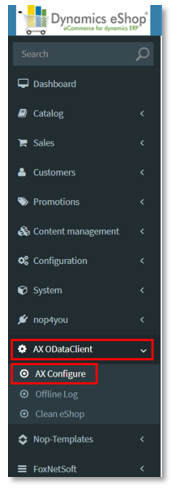
On the Dashboard menu panel on the left side of the page, click > AX ODataClient > AX Configure.
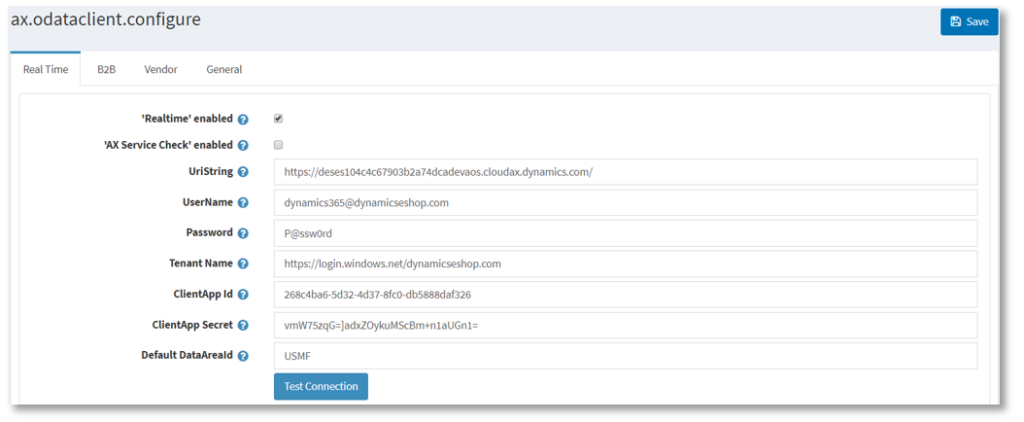
Here you will see four (4) tabs at the top of the page: Real-Time, B2B, Vendor and General. You will need to check review the Real-Time tab and make sure all seven (7) of the required fields shown above are completed.
If any or all of the fields are not completed, please contact your IT department. The following links may be useful:
- This link will help register the application with the Azure Active Directory for your Finance and Operations Web Client: https://docs.microsoft.com/en-us/azure/app-service/configure-authentication-provider-aad#-create-an-app-registration-in-azure-ad-for-your-app-service-app
- Using the Client ID, this link will help to set the Azure Active Directory Applications in your Finance and Operations: https://docs.microsoft.com/en-us/dynamics365/unified-operations/dev-itpro/data-entities/services-home-page#register-your-external-application-in-finance-and-operations
4.User Guide for Setting up the Data
Once the eShop website is live, propagate the site with data for testing integration. This means publishing the data from Microsoft Dynamics 365 Finance and Operations to the eShop website. Below is the procedure to setup the data individually. Start with publishing a Category and then the Products so every Item created can be associated with their respective Category.
4.1.Create and Publish Categories
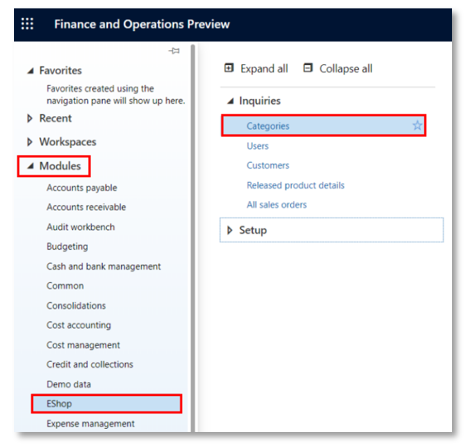
From the Microsoft Dynamics 365 Finance and Operations Dashboard > click the hamburger menu > Modules > EShop > Inquiries > Categories.
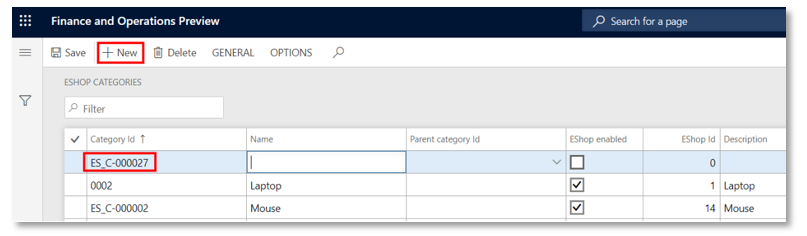
To publish a new Category, you will need a unique Category ID, Name and Parent category Id.
To begin > +New. Category ID will automatically populate a unique number and jump to the Name field > assign a Name > tab to the Parent category Id field.
NOTE: When creating a Parent Category, leave the Parent category Id field blank. The objective here is to create a hierarchical menu (or multi-level arrangement of options) generally found in most websites.
For example, say you are selling clothing. One Parent Category may be Women’s Fashion. It would also have its own unique Category ID. Within Women’s Fashion there are many subcategories. For this example, we will choose dresses, blouses and skirts. These subcategories (or Items) will also each have their own unique Category ID.
In order to link the Items with their Parent Category and create the hierarchical association, we will need to enter the Category ID of the Parent Category, Women’s Fashion, into the Parent category Id fields for each of the Items.
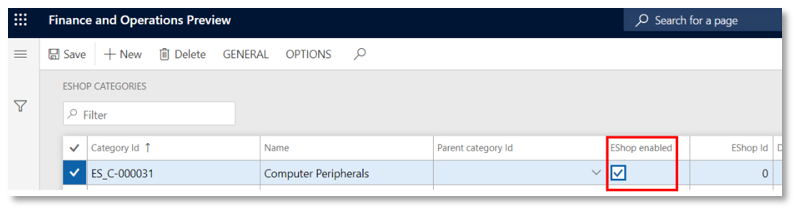
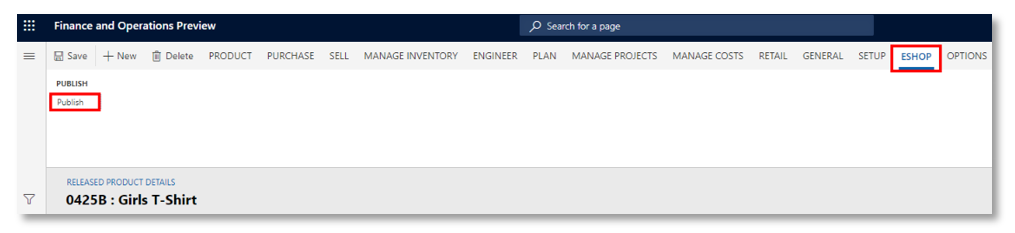
eShop ID must be checked for the Category to publish onto the eShop website.
Next locate GENERAL on the menu bar just below the header > click Publish. You will receive a confirmation message that your Category has been published.
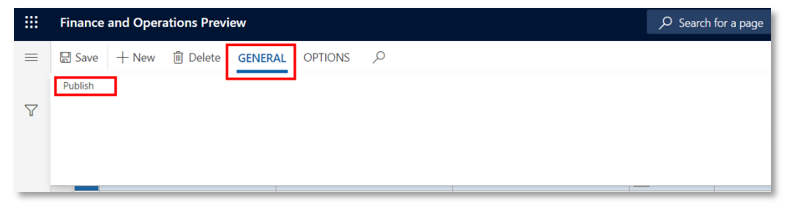

NOTE: The eShop ID field will be auto-populated with a unique number once your category is published.
TO TEST: Go to your eShop website. The Category you just published will show on the homepage. You can also look for it under the Product section from your eShop website’s main menu.
4.2.Create and Publish Item
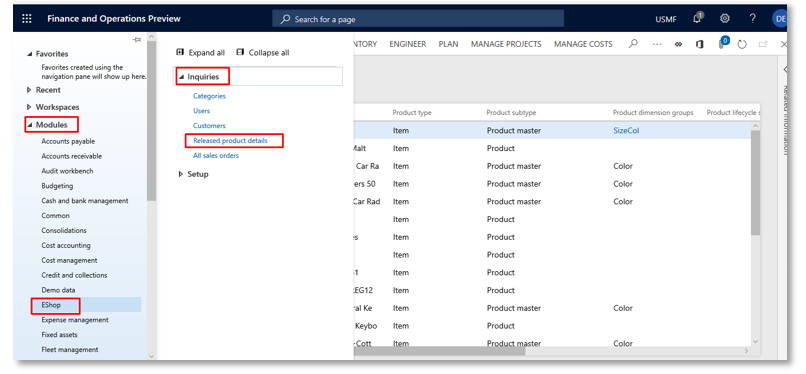
From the Microsoft Dynamics 365 Finance and Operations Dashboard > click on the hamburger menu to open the navigation pane > click Modules > EShop > Inquiries > Released Product Details.
If you are creating a new Product you can click +New or PRODUCT and complete the mandatory fields.
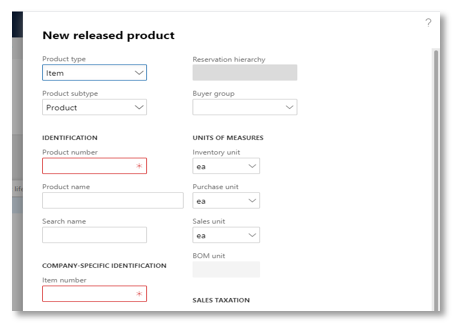
Once you have completed the mandatory fields, click the OK button. You will then be taken to the Released Product Details page.

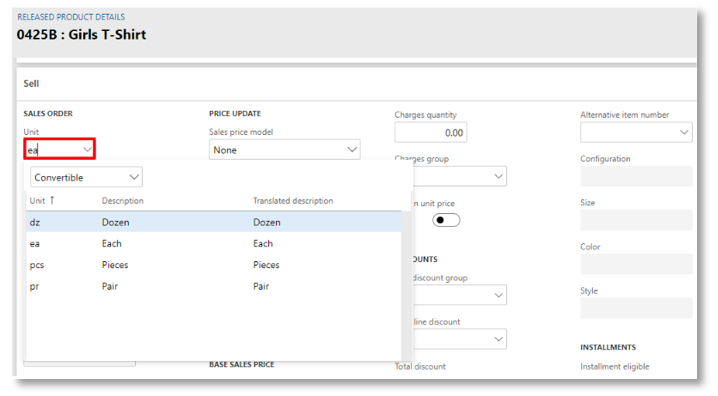
Go to the Sell tab on the Released Product Details page > click on the dropdown arrow to open that section > click Unit to select your product’s UOM.
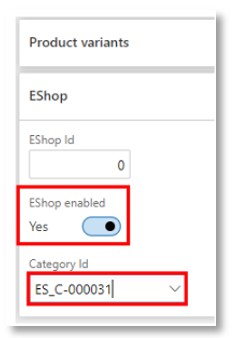
Go to eShop > click on the dropdown arrow to open that section > click on the slider to change it from No to Yes. This will enable> select your Category ID.
Access EShop on the fast tab menu > click publish. The eShop ID will be auto-populated once the item is published. You will also receive a confirmation popup box that your item has been published to your eShop website.
TO TEST: Go to your eShop website, search for the item you published in the search field or in the products menu from the main menu bar. You should find the item listed under the respective Category you selected.
4.3.B2B User Created in Microsoft Dynamics 365 Finance and Operations & B2C User Created on the Website
4.3.1.B2B User: Created in Microsoft Dynamics 365 Finance and Operations
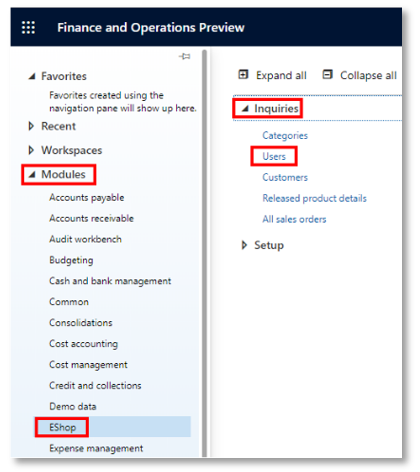
From the Microsoft Dynamics 365 Finance and Operations Dashboard > click Modules > EShop > Inquiries > Users.
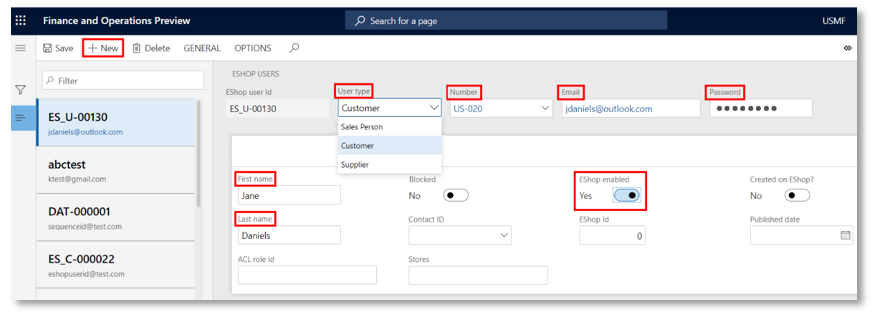
To create your new eShop User > click +New > enter the mandatory fields.
Eshop user Id This will auto-populate a unique series of numbers and letters.
User Type Select Customer in the drop-down menu.
Number Select the Customer Number associated with the user you are creating.
Email Email address and eShop website login of your new Customer.
Password Initial password for your new Customer.
First name First name of your new Customer.
Last name Last name of your new Customer.
Eshop enabled Set this to Yes to push the information into your eShop website.
On the main menu > click GENERAL > Publish

NOTE: The EShop Id is auto-populated once the User is published and you will receive a pop-up confirmation message stating that the User is Published.
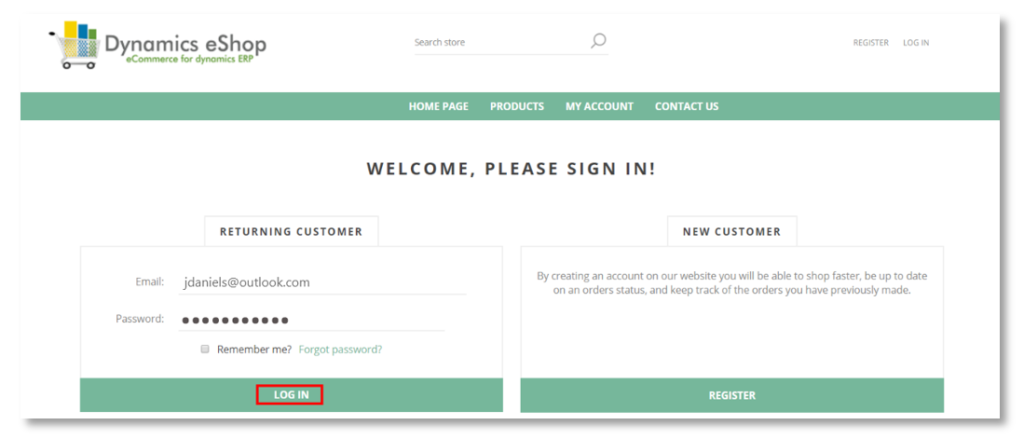
TO TEST: Go to your eShop website and click on LOG IN on the top left corner of your screen.

Enter the new Customer’s Email address and Password under RETURNING CUSTOMER > click LOG IN. If the new eShop website Customer was created successfully, you will be logged into the eShop website.
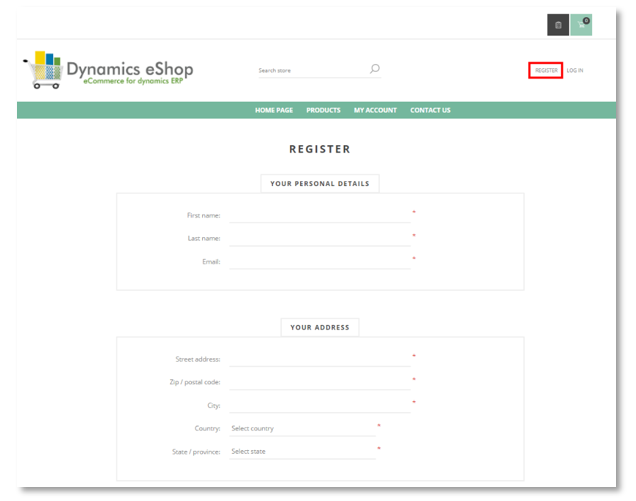
4.3.2.B2C User: Created on the eShop Website
Typically, customers are encouraged to register (create an account) on the eShop website and checkout so their account information exists in the system. That way, they will have the ability to view all their transactions, open orders and closed orders in the future.
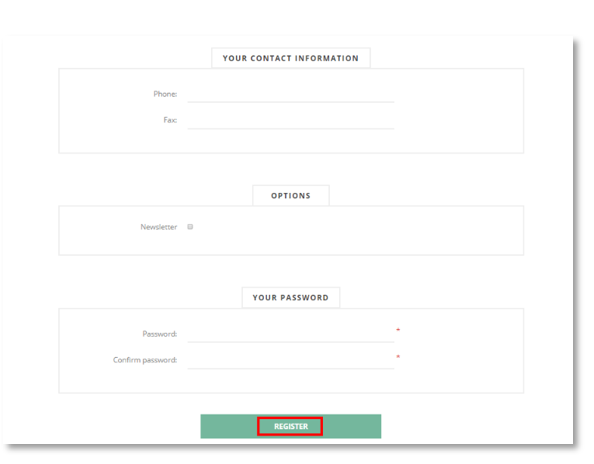
To create an account > go to the eShop website and on the top right corner > click on REGISTER. Enter all the mandatory fields on the page and click the REGISTER button. Clicking REGISTER will create a web customer entry in Microsoft Dynamics 365 Finance and Operations.
TO TEST: Logout of the account you just created and go back to the eShop website > click LOG IN > enter in the new username and password. If an account was created successfully, you should be logged in.
5.Create an Order
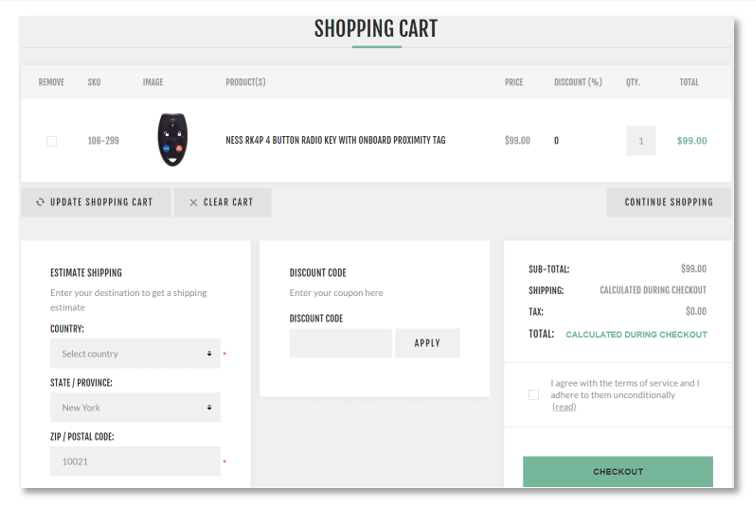
LOG IN to the eShop website with the new user’s credentials and browse the eShop website > select an Item to Add to Cart > go to the Shopping Cart > Checkout > at BILLING ADDRESS select Ship to the same address > click NEXT.
Now select a SHIPPING METHOD > click NEXT (Use the default Shipping Method to test) > select a PAYMENT METHOD (Use PO Order for your test and enter any number) > click NEXT > click on CONFIRM ORDER. This will create a real-time Sales Order in Microsoft Dynamics 365 Finance and Operations.
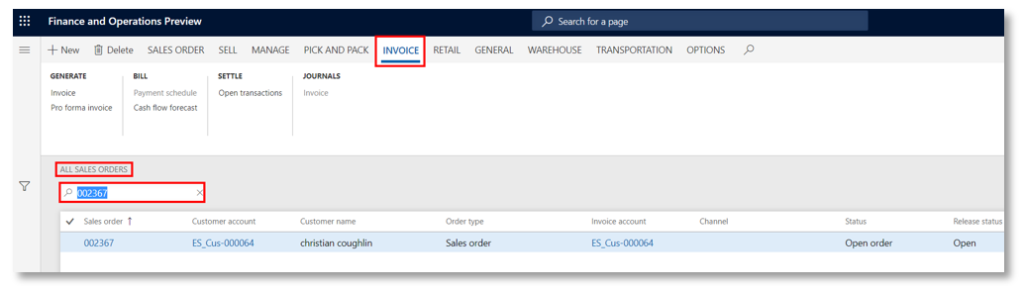
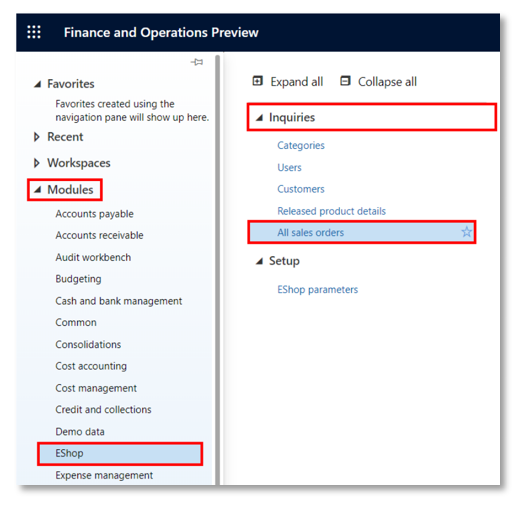
TO TEST: Copy the Order Number and go to Microsoft Dynamics 365 Finance and Operations > Modules > EShop > click Inquiries > All sales orders.
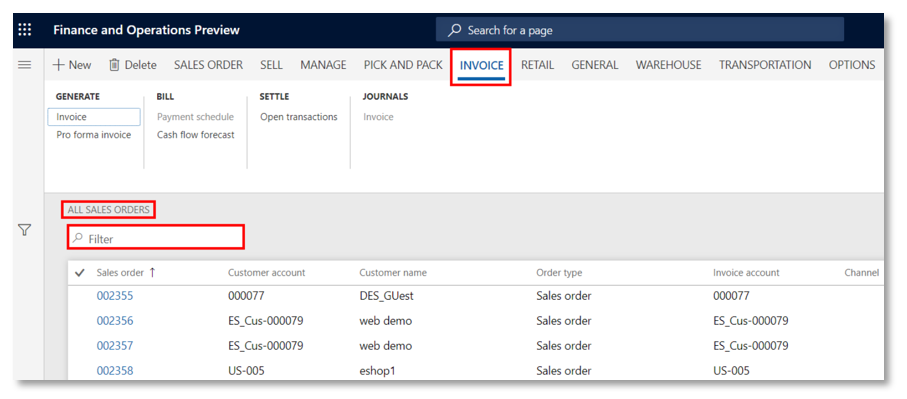
On the ALL SALES ORDERS page, you can search for your newly created Order by its Sales Order number. Paste the Sales Order number you copied from the eShop website into the Filter search field just to the left of your screen, above the Sales order column > hit Enter on your keyboard. If the Order was crated successfully, you will see your Sales order number isolated on your screen.
Verify that all the items purchased are included in the new Sales Order. Go to the SALE ORDERS DETAILS page by clicking on the Sales order number. Once there you can review the Sales order lines list.