
eShop Installation Guide
The purpose of this document is to guide you through the Installation and Setup of eShop for Dynamics 365 Business Central. This document assumes that the eShop App has been downloaded from Microsoft Appsource onto your Dynamics 365 Business Central.
eShop Account Registration
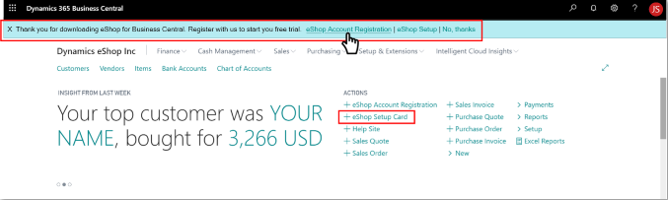
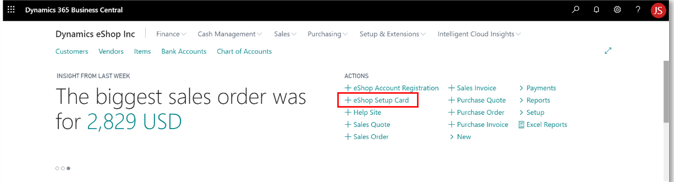
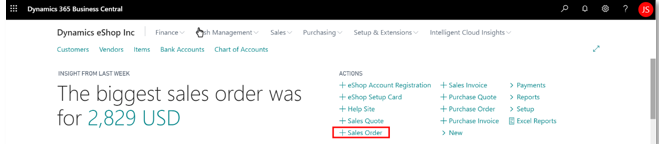
Upon successfully downloading the app from Microsoft Appsource, you will see 2 icons on the homepage immediately under the ACTIONS section of the Dynamics 365 Business Central page: +eShop Account Registration and +eShop Setup Card.
- +eShop Account Registration – This will be used to collect the necessary information from you to create and share your new URLs.
- +eShop Setup Card – This is the place where you will configure the URLs and default settings that will apply to the new site created

TO START: Go to Dynamics 365 Business Central Dashboard > click on the +eShop Account Registration and follow the onscreen instructions to register with us. This opens the ESHOP SETUP WIZARD.
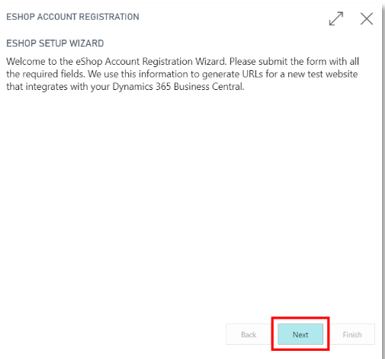
Follow the prompts in the ESHOP SETUP WIZARD to set up the ESHOP ACCOUNT REGISTRATION information.
Fields with a red asterisk are required fields and must be completed to move forward. The asterisks will disappear as each field is completed.
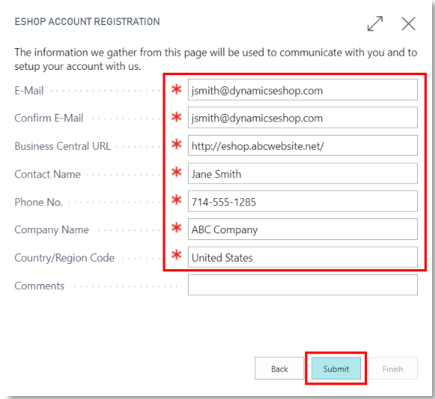
After completing the ESHOP ACCOUNT REGISTRATION form with all the required fields > click Submit. You will receive an email confirmation from Dynamics eShop within 24 hours of successfully submitting your ESHOP ACCOUNT REGISTRATION form > click Finish.

NOTE: Dynamics eShop will setup a website and email you the website’s URL. (For the Microsoft Testing Team, please check the test accounts document instead of waiting for the email).
eShop Setup Card
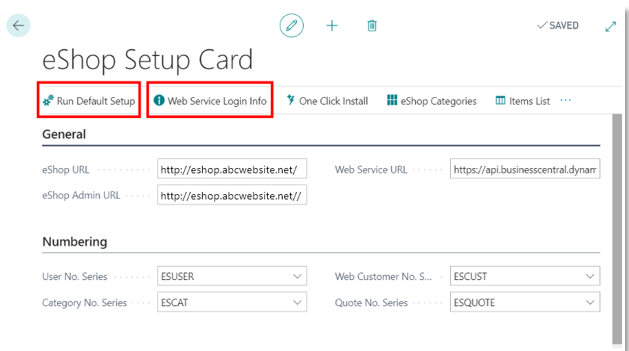
Once you have received your credentials (User ID and Password), you are ready to proceed with the installation. Begin by accessing Dynamics 365 Business Central > +eShop Setup Card. There are 3 steps you must complete on this page:
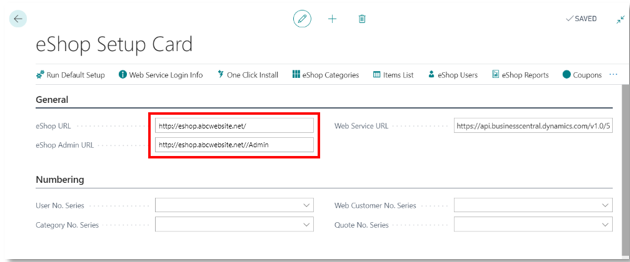
- Enter your eShop URL in the field under General. The eShop Admin URL field will be automatically populated.
- Run Default Setup
- Get Web Service Login Info
NOTE: If the User ID you are using for your login does not have the required permissions to access eShop, you may not be able to see the +eShop Setup Card in your ACTIONS area. However, you should still be able to get into the +eShop Setup Card via the Notification Link.
NOTE: You may expand the width of any window by clicking on the double-ended arrow at the top right of the window.

- eShop URL Setup
Enter your eShop URL > tab over the eShop Admin URL and the Web Service URL fields and they will be auto-populated. Should the fields not autofill – and for future reference – our email confirmation will contain both the eShop Admin URL and the Web Service URL to fill in those fields.
- Run Default Setup
On the +eShop Setup Card page > click on the Run Default Setup icon located on the Ribbon. This will configure the default settings, auto-generate the necessary fields within the Numbering section of the +eShop Setup Card and setup the Web Service Login Info. Notice that the User No Series, Category No. Series, Web Customer No. Series and Quote No. Series fields are now completed.
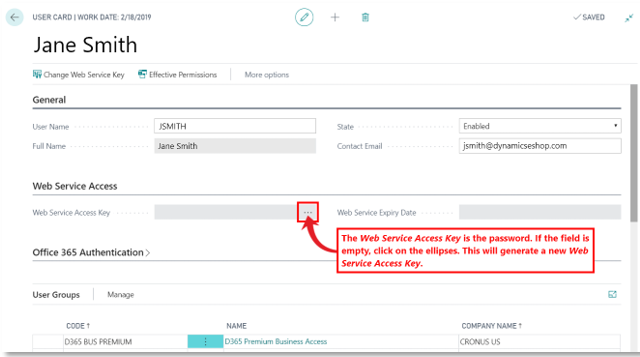
- Web Service Login Info
When you click on the Web Service Login Info icon, you will be directed to your Dynamics 365 Business Central USER CARD page. There is information within two sections you will need to make note of: the User Name in the General section Web Service Access Key in the Web Service Access section.
NOTE: The Web Service Access Key field information will need to be setup by accessing your Website’s backend (or Administration). You can access the backend by logging into your Website with your administrative login ID and password provided in our earlier email).
Once you have completed this, the setup in Dynamics 365 Business Central will be complete. Your new Website is now ready with the Standard theme implementation.
eShop Admin Setup
Your next step is to connect the Website to your Dynamics 365 Business Central. To do this, follow one of the steps below.
- You will need your new Website URL and credentials provided to you in your original eShop email. Enter the Website URL into your internet browser as you would to access any other website. When the page appears, log in using the credentials from that same email. You will then be able to access the backend of the Website by clicking on the ADMINISTRATIVE link which will be located at the top center of the page of your Website.
OR
- Go to the +eShop Setup Card > click on the pencil icon at the top-middle of the page.

This will turn both the eShop URL and eShop Admin URL into active links. Click on the eShop Admin URL link and you will be redirected to the backend of your Website > click on the ADMINISTRATION link located at the top center of the landing page (or Homepage) of your Website. This will take you to your the eShop Dashboard.
![]()
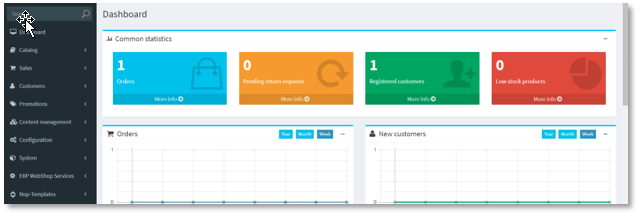
From the eShop Dashboard > go to the side panel on the left of the page > select ERP WebShop Services > select ERP Configure from the drop-down menu.
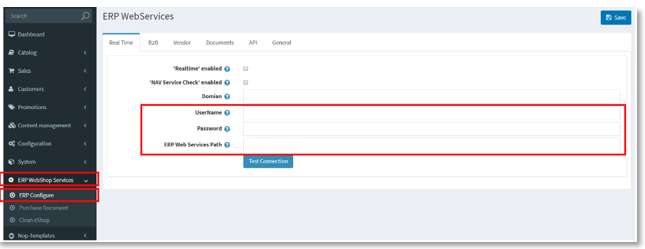
Enter the following information into each of the 3 fields encased within the red box shown above.
- User Name: Your Dynamics 365 Business Central Login User Name
- Password: You can find the Web Service Access Key in the Web Service Access section of the +eShop Setup Card
- ERP Web Service Path: You can find the Web Service URL in the General section of the +eShop Setup Card.
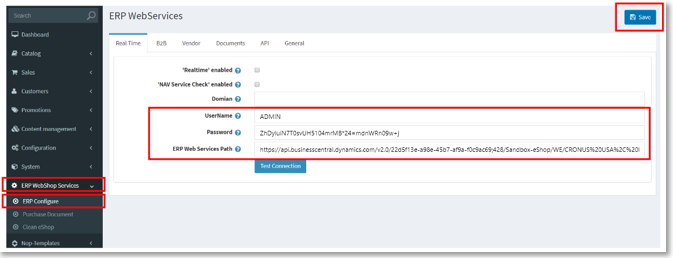
Once the above 3 fields are completed > click Save at the top right of the window. Once saved, test the connection to your Website > click the Test Connection just below the ERP Web Service Path field.
![]()
If your connection is successful, you will see the message ERP Web Services Path connection – Connection Successful. This means your eShop is ready with real-time integration to Dynamics 365 Business Central.

User Guide for Setting up the Data
Once your Website is Live, propagate the Website with data for testing integration. This means publishing the data from Dynamics 365 Business Central to the Website. There are 2 ways of accomplishing this: 1) Manually by publishing each product individually, or 2) Mass publishing by using our One Click install functionality. Section 5.1 (below) will give you the steps to manually setup the data.
Create and Publish Category
Start with publishing a Category and then the Item. You will want all Items you create to be associated with their respective Category.
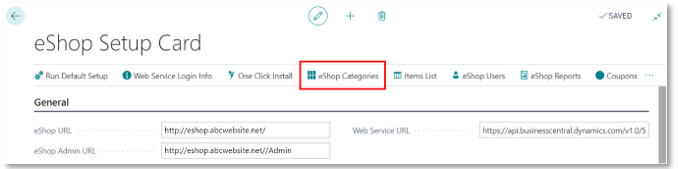
From the Dynamics 365 Business Central Homepage > click on +eShop Setup Card.
From the +eShop Setup Card page > click on the eShop Categories tab. This will take you to the ESHOP CATEGORY LIST page.
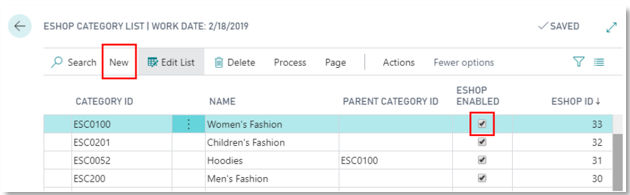
Once in the ESHOP CATEGORY LIST page, you will need to provide a unique CATEGORY ID, NAME, and PARENT CATEGORY ID.
To begin > click New on the Ribbon to add an empty line of fields. You can then click into the empty CATEGORY ID field to begin typing your first unique CATEGORY ID then > tab through to complete the remaining fields. You may leave the ESHOP ID field at 0 until you are ready to publish the Category.
NOTE: The default setting for the ESHOP CATEGORY LIST page allows for editing the fields; notice that the Edit List tab is highlighted in grey. Once in the form, you can click on the Edit List tab to change the form to view-only mode.
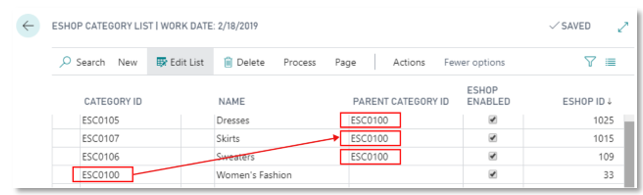
NOTE: If you are creating a Parent Category, leave the PARENT CATEGORY ID field blank. The objective here is to create a hierarchical menu (or multi-level arrangement of options) generally found on most websites.
For example, say you are selling clothing. One Parent Category may be Women’s Fashion. It would also have its unique CATEGORY ID. Within Women’s Fashion, there are many subcategories. For this example, we will choose dresses, blouses, and skirts. These subcategories (or Items) will also each have their unique CATEGORY ID.
To link the Items with their Parent Category and create the hierarchical association, we will need to enter the CATEGORY ID of the Parent Category, Women’s Fashion, into the PARENT CATEGORY ID fields for each of the Items.
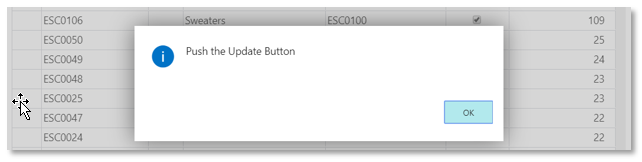
ESHOP ENABLED will need to be checked to publish each Category to the Website. When you check the ESHOP ENABLED check box for a new Category, you will get a pop-up box alerting you to Push the Publish button > click OK.
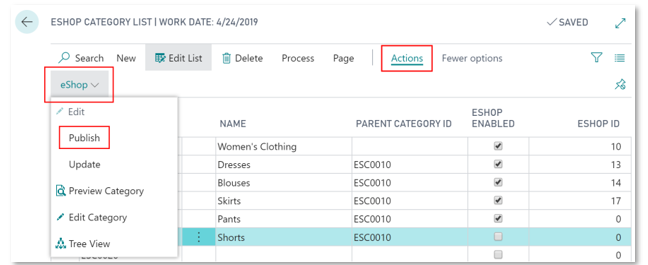
On the Ribbon > click More options which will reveal the Actions option > click Actions > click the eShop drop-down menu > select Publish.
You will receive a pop-up confirming that your Category has been published > click OK.
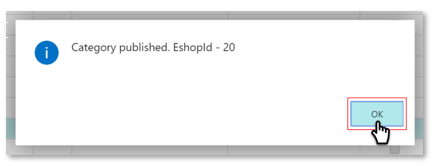
NOTE: The ESHOP ID field will be auto-populated with a unique number once the category is published.
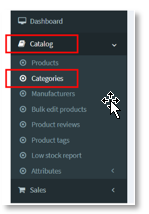
TO TEST: Go to your Website > click the ADMINISTRATION link. From the Dashboard > go to the side panel on the left > click Catalog > click Category.
You will then see the Manage Categories page. If you search for the Category you just published it should show in the list.

You should also be able to see the Category on the Homepage. From the Website’s main menu > click PRODUCTS.

Create and Publish an Item
From the Dynamics 365 Business Central Homepage go to the > click on +eShop Setup Card and click the ITEM LIST Icon.
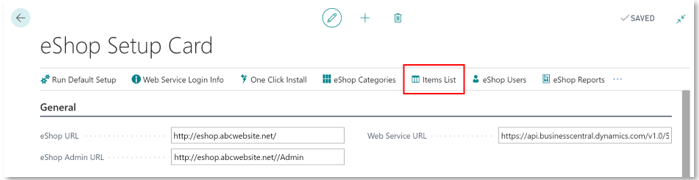
The ESHOP ITEM LIST will appear. Here, you can either select, edit, or add items to your inventory categories. If you want to create/add a new item > click + New > complete the fields giving your Item a unique NO. and ESHOP ID.
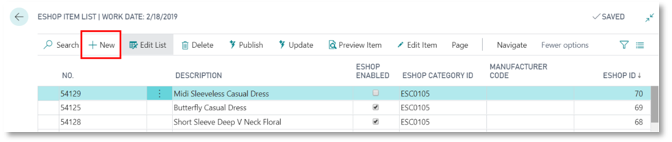
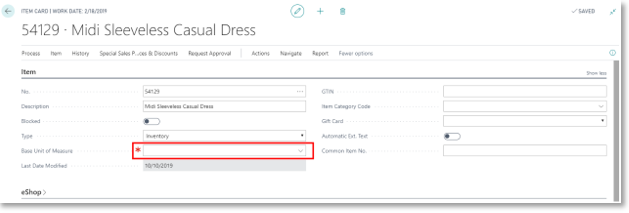
If you are creating a new Item, you will need to fill in all the mandatory fields for that Item. To do this, open the ITEM CARD > click on the ellipses within the NO. field.

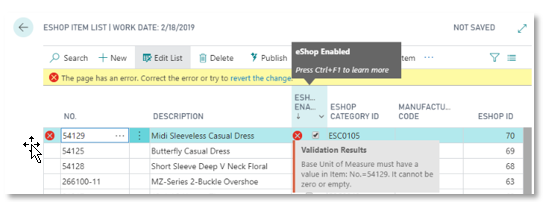
The mandatory fields are indicated with a red asterisk (Mandatory fields not shown in the image below are “Gen. Prod. Posting Group” and the “Inventory Posting Group”). Leaving any of the 3 fields empty will generate an error when you try to select ESHOP ENABLE.
NOTE: If any of the mandatory fields are left empty, you will receive an error when trying to select the ESHOP ENABLE box. This example indicates that the Base Unit of Measure field was not completed.
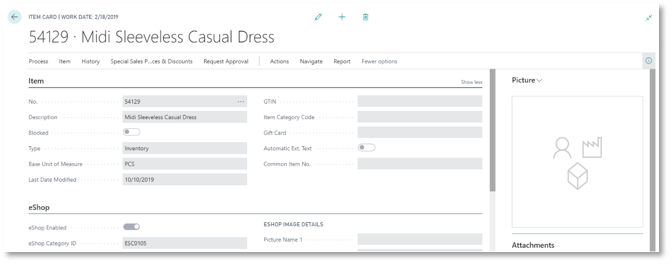
To reveal the mandatory fields and clear the error > click on the Pencil icon.

Once the mandatory ITEM CARD fields have been completed, your Item will be enabled and ready to push to your Website.
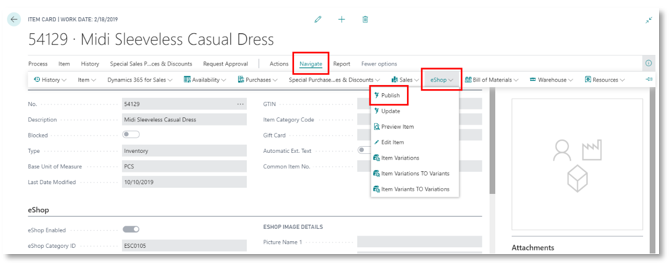
From the ITEM CARD quick access ribbon > click on Navigate and the ribbon will expand with more options > select eShop and from the eShop dropdown menu > click on Publish.
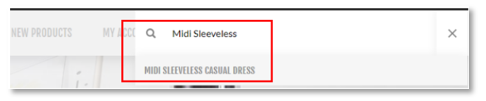
TO TEST: Go to your Website, and search for the newly published Item in the search field or the products tab from the Ribbon, you will find the Item listed under its respective category.


Create an eShop User
B2B User: created in Dynamics 365 Business Central name.
To create a new eShop User go to the Dynamics 365 Business Central Homepage > click +eShop Setup Card > click eShop Users > New.

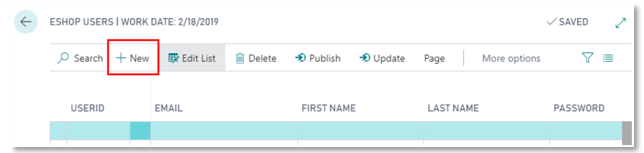
Then enter the following information for the mandatory fields:
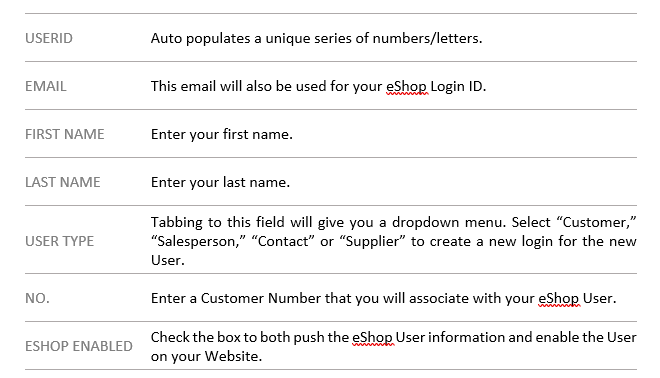

Once the mandatory fields are completed > click Publish. Once published, a unique ID number will be auto-populated and inserted into the ESHOP ID field.

TO TEST: Go to your Website and log in > hover over the image of the lock at the top right of your Homepage.
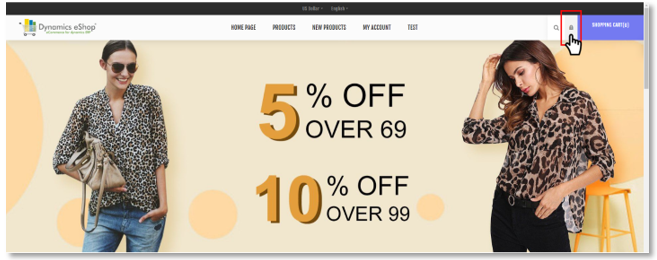
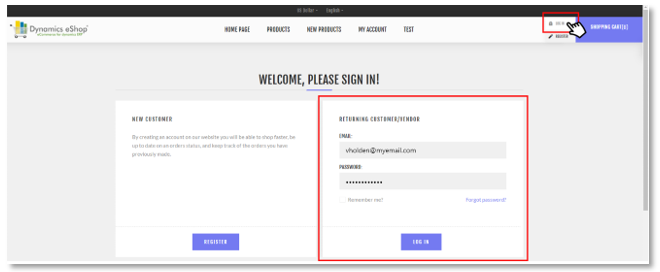
The image will change to a lock with the words LOG IN > click on LOG IN.

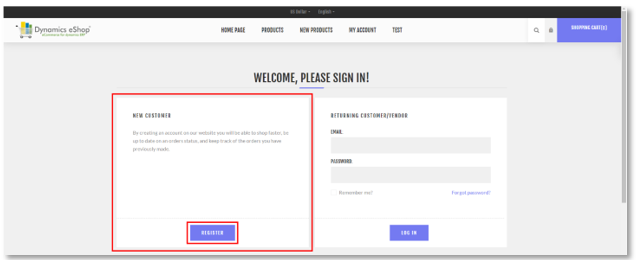
At the WELCOME, PLEASE SIGN IN! page > go to the RETURNING CUSTOMER/VENDOR window > enter your login ID and password. If your eShop user was created successfully, you will be logged into your Website.
B2C User: Created on Your Website
Typically, customers are encouraged to Register (or create an account) on the Website. Registering directly will allow them to check whether their account information is in the system. They will also be able to view their transactions, and open and close orders.
To create a customer account, you will need to log into the Website as demonstrated in section (5.3.1). For illustration purposes, we will create a fictitious customer account > go to the NEW CUSTOMER window > click on the REGISTER button. This will open the REGISTER page.
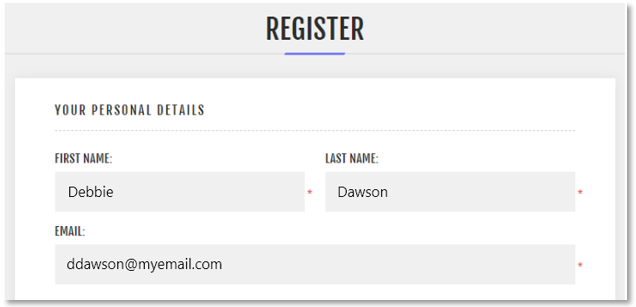
At the REGISTER page, enter all the required information. Fields with an adjacent red asterisk indicates that the information is required.
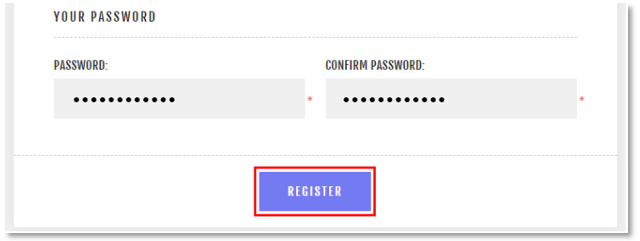
Once you have completed the fields > click on the REGISTER button. This will also create a new web customer entry in Dynamics 365 Business Central.
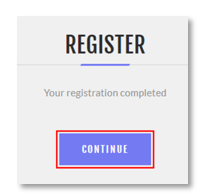
If your registration was successful, you will see the following message > click CONTINUE.
TO TEST: After creating the fictitious customer account > log out of the Website > log in again > go to the RETURNING CUSTOMER/VENDOR > enter the login ID and password of the new customer you just registered. If the account was created successfully, you will be logged in.
Create an Order
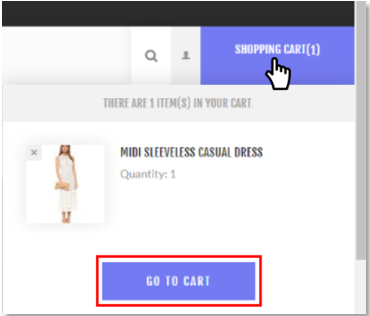
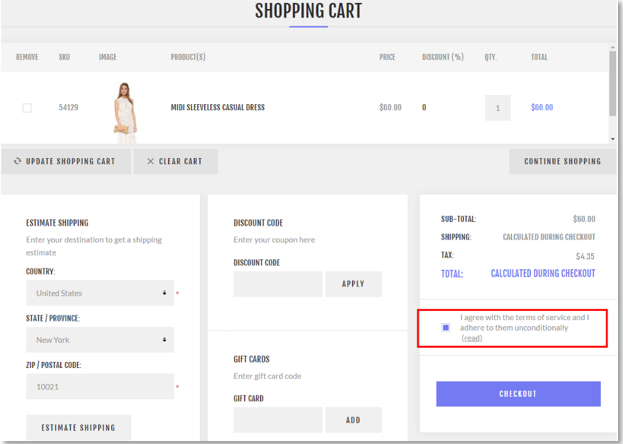
Log into the Website with either your administrative login ID and password or with the login ID and password of the fictitious customer you just created in the previous section > browse the Website > select an item and add it to your SHOPPING CART. You can preview what is in your SHOPPING CART by hovering over the SHOPPING CART button at the top right of your screen and then > click on the GO TO CART button. This will take you to the SHOPPING CART page.
You will need to agree to the Website’s terms of service before completing the transaction. If you try to checkout without clicking the checkbox, you will get the following notification.
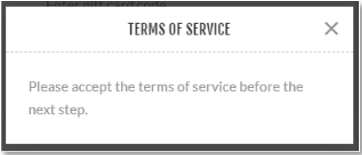
Click the checkbox to give your assent to the terms of service then > click on the CHECKOUT button.
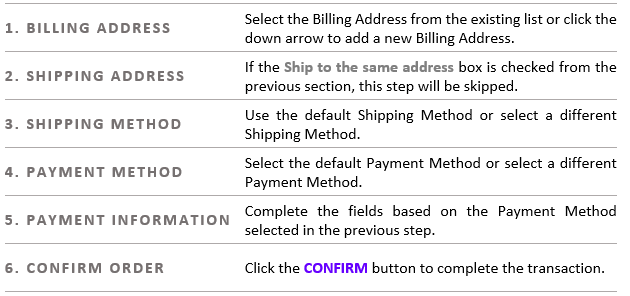
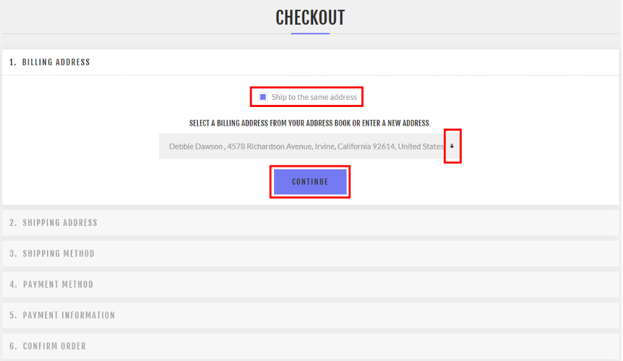
Here you will follow 6 steps to complete your order. All fields with an adjacent red asterisk must be completed to move forward. Once a section is completed > click the CONTINUE button to move to the next section, and so forth. You may click the BACK button to return to previous sections in steps 2 through 6.
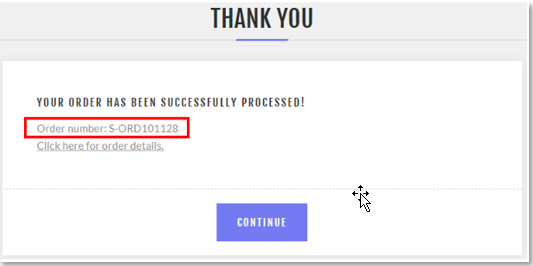
This creates a real-time Sales Order in Dynamics 365 Business Central.
TO TEST: Note the Order Number you created > go to Dynamics 365 Business Central > click +Sales Orders within the ACTIONS area > search for the Order Number and verify that the item you purchased shows up as one of the line items.

NOTE: eShop integrates in real-time with many shipping carriers and will pull the most current shipping prices onto the Website. eShop also integrates with payment gateways for real-time credit card processing. All this information needs to be set up in the backend by keying in your administrative login ID and password. Once the basic functionality has been tested to your satisfaction, eShop can help with the advanced setup of the Website and mass publishing of your data to the Website.